
May
03
May 3, 2023
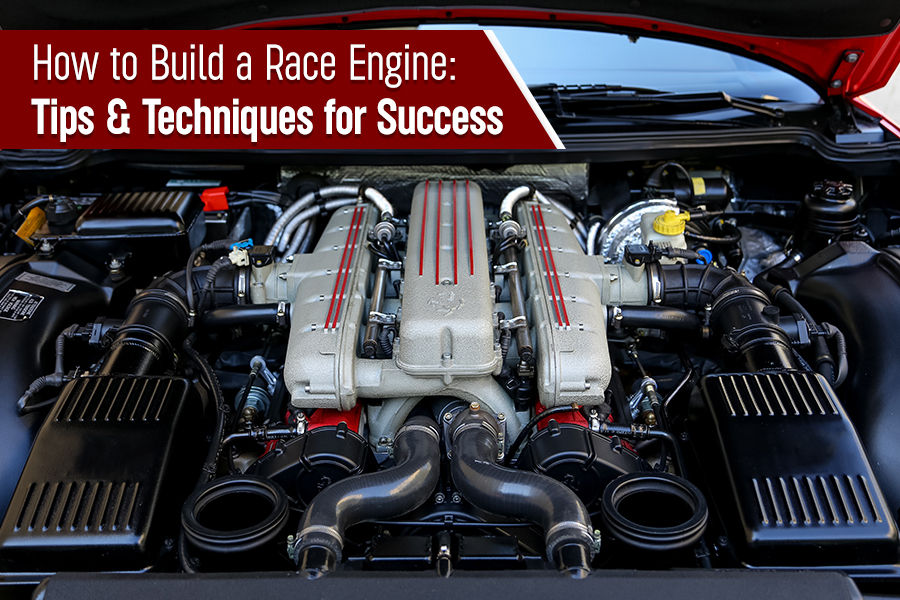
Building a race engine can be a challenging and rewarding experience for anyone interested in high-performance engines. Whether one is building a race engine for drag racing, circuit racing, or any other type of motorsport, several tips and techniques can help ensure success.
The key to building a race engine is attention to detail and precision. Every component must be selected, machined, and assembled to exact specifications to achieve the desired level of performance. In addition, a thorough understanding of engine theory and mechanics is necessary to make informed decisions throughout the build process.
Our blog is all about how to build a race engine, including tips and procedures. This guide will provide valuable insights and information to help you achieve your goals and taste tremendous success.
So here you go!
Building a high-performance race engine requires technical knowledge, precision, and attention to detail. Whether the engine is for drag racing, road racing, or any other type of motorsport, there are a variety of tips and techniques that can help achieve success.
Making their engines can be a feasible option for ambitious and cost-conscious racers, especially if they collaborate with a reliable machine shop. Nonetheless, it is advisable to seek the assistance of a trusted fellow racer, engine designer, or builder having experience in engine building, as they can provide guidance and support throughout the process.
Let’s explore some of the key concerns and best practices for building a race engine-
The first step in planning a race engine is to know the specific engine requirements. It includes the type of racing, knowing about model engine supplies, the displacement limit, and the power and torque targets.
The limitations of building a race engine include the restrictions imposed by racing venues, which can limit power and speed or control expenses. These restrictions provide fixed goals to target, but builders must adjust their strategies accordingly. Some builders enjoy the challenge of maximizing performance despite handicaps, while others do not. It is important to examine common handicapping methods to understand how they might affect a specific engine build.
Once the builders know the requirements, the next step is to know the engine configuration. It includes the number of cylinders, the bore and stroke dimensions, the compression ratio, and the valve train layout.
When the design is ready, it’s time to order the parts. To guarantee a successful engine build, one has to look into effective communication of accurate information to the parts supplier. Providing detailed specifications for parts requirements is essential in avoiding delays caused by receiving incorrect components and waiting for replacements. Communicate the engine plans and limitations, including the addition of an aftermarket exhaust guide which can significantly impact the performance and sound of the engine. Designers or builders should look into block types, bore size, compression ratio, crankshaft type, manifolds, intake heads, exhaust system, camshaft, ignition source, spec motors, valve gear, fuel system, and RPM levels precisely to the supplier to ensure the one gets their dream engine.
After selecting the components, the engine can be designed. This involves creating a detailed blueprint for the engine, including the dimensions and specifications of each component, the clearances, and the tolerances.
Once the builder has thought of and selected the components, they have to think of assembling and machining them to their exact specifications. This includes honing the cylinder bores, balancing the rotating assembly, and setting valve clearances. Proper machine work and assembly are critical to achieving optimal engine performance, so plan on it accurately.
After engine assembly builders need to tune it to ensure it can operate at peak performance. It involves adjusting fuel and ignition timing and optimizing airflow and exhaust. Engine tuning can have a significant impact on the engine’s power output and overall reliability.
Testing is significant when it comes to designing a machine. For race engines, designers have to go through this phase for product approval. If there are problems in initial engine testing, designers must fix the glitches by returning to the preliminary design plan. Taking the driver’s feedback is important at this stage.
Once the engine has been tested and tuned, it can be installed in a race car. During the race, monitoring the engine and keeping strict maintenance to ensure its performance would be good.
To ensure the longevity and reliability of a race car engine, it’s important to perform regular maintenance, such as oil changes, spark plug replacements, and valve adjustments. This can help prevent major engine failures and keep the engine performing at its best.
The first step in building a race car engine is to establish a clear design and plan. This involves selecting the appropriate components, such as the block, crankshaft, camshaft, pistons, and cylinder heads, to ensure the engine can meet the specific requirements of the race. Whether you are an experienced person or an amateur, understand what it takes in the design and planning to build an engine for a race car.
Designing a racecar engine involves high-level analyses, goal specifications, and a preliminary design for reference. To start the design process, it’s crucial to have a comprehensive understanding of the available resources and their associated limitations. These resources can be diverse and may include time, budget, and prior experience, as well as design and construction facilities such as computing resources, prototype and manufacturing machinery, testing equipment, instrumentation, and more. With ingenuity, it’s possible to replace one or more resources with an alternative.
Some key steps to designing a race car engine are-
Analysis– When designing a race engine, the design team should gather information on regulation changes, evaluate the performance of previous designs, and conduct a benchmarking study to evaluate the performance of concurrent teams. This will help them set design constraints and goals, identify strengths and weaknesses of previous designs, and quantify the performance of opponents to specify performance goals. Obtaining data from opponents can be difficult, but it is important in setting performance goals.
Goal and constraints– At this phase, designers or builds have to look for specific constraints imposed on a car. they can be practical limitations that need to be fixed. The main constraints may be related to technical or sports regulations, hence the designers have to be aware of the rules and constraints imposed by higher authority. Also, budgetary and workforce limitations may occur. One great example is the 2-week shutdown that happened in Formula 1 because of a contract by the Formula One Teams Association (FOTA) that intended to reduce the expenses of running a cutthroat team.
Preliminary designing– The design and analysis of racing car engines are crucial. The goal is to create a car that is fast, reliable, and safe to drive. This involves a complex set of considerations satisfying packaging requirements. At this stage, gather some data to distribute components properly around the car followed by the detailed design process. The final product is a racing car engine that is optimized for performance, safety, and reliability.
Detailed designing– Detailed designing has to be done intricately keeping several things in mind. Designers have to incorporate Failure Modes and Effects Analysis (FMEA). The process also includes designing the wind tunnel model and running CFD analyses, kinematic analyses of the suspension, and detailed design of other systems. The designer uses analytical tools to determine the best scale model engines, suspension geometry and stiffness, stress analysis, and performance simulations. If the overall performance with the final engine is not as desired, or if design conflicts arise, returning to a previous design phase is obligatory.
Having a professional by your side would be good to discuss the time is taken, budget, and other aspects of building a racecar engine.
The block preparation consists of align-honing the mains, boring and honing the cylinders, and decking the block. Most of the cast aluminum engine blocks are constructed of one kind of alloy among the three varieties.
Before the assembly, the heads and blocks must be cleaned by dipping them in acid or another method to eliminate the old paint, oil deposits, and sealants. It is then required to think about the machine work needed before motor assembly.
It may be beneficial to undertake some machine work, albeit in moderation to increase your likelihood of success with the motor. It is often possible to have the same shop that acid-dipped your motor carry out additional tasks such as milling the block and heads, align-boring the block, and recutting the valve seats. It would be prudent to obtain quotes for these services and determine what is feasible within the budget. The valve seats and alignment are two critical areas where the investment is worthwhile.
In case it is noticed that there are several bolt holes with worn threads, it is imperative to enlist the services of a knowledgeable professional for repair. Be mindful of these areas, not just only during the motor’s assembly.
Assembling the car parts has to be perfect. A small mistake can cost the car owner a lot. Builders have to pay attention to minute details that make a stupendous motor or an average one. The process of assembling a race engine can be complex and time-consuming, but following the proper steps and using high-quality components can result in a high-performing engine that can help you win races. Here are some general steps to follow when assembling a race engine-
Disassembly– Before starting to assemble the race engine, one needs to take it apart and inspect all of the components. This will help identify any worn or damaged parts that need to be replaced.
Cleaning– Once the engine is disassembled, builders need to clean all of the parts thoroughly. This includes using a parts washer, brushes, and solvents to remove all traces of oil, dirt, and debris.
Inspection– After cleaning, inspect all of the parts for wear and damage. Any components that are not up to par should be replaced with new parts.
Machine work– Depending on the specific engine build, builders may need to have some machine work done. This can include boring and honing the cylinders, grinding the crankshaft, or machining the cylinder head.
Pre-assembly– Before starting to put the engine back together, pre-assemble some of the components. It can help ensure that everything fits together properly and that there are no clearance issues.
Before starting up– Before starting to put the engine back together, it’s a good idea to pre-assemble some of the components. This can help ensure that everything fits together properly and that there are no clearance issues.
Assembly– This is the stage to start putting the engine back together. Car engine builders have to start by installing the crankshaft, pistons, and connecting rods. Then install the camshaft and cylinder head, along with all of the other components, such as the oil pump, water pump, and timing chain.
Engine parts are a crucial foundation for any engine, whether it’s for a race car or a regular street car, as they significantly affect its reliability and performance. To ensure a successful assembly, engine builders should follow these step-by-step procedures to fit all the parts:
Start by washing all components, including bores, with soapy water.
Check all studs, bolts, and washers for any damage or defects.
Assemble the engine in well-lit and dust-free surroundings.
Systematically set up engine components to make sure they fit appropriately.
confirm the quality and compatibility of new parts before fitting.
Inspect and measure all machined surfaces to ensure their quality.
Evaluate the condition of all reusable parts to determine their suitability for use in the engine.
Measure and document the clearances of big-end, piston/bore, and major vertical oil to preserve precise records.
Tighten all bolts consistently in a interweave pattern.
Grease all threads and bolt head contact points, using a tension wrench where necessary, such as big ends, cam gears, head, mains rockers, flywheel, etc.
Apply Loctite to bolts that require safety lock, such as cam thrust screws, chain adjusters, oil pick-up mount, cam gear, etc.
Builders must not install bolts without tensioning instantly.
They should in no way install a sump plug without a fresh washer and tighten it.
Builders must use high-quality sealer where needed to avoid typical silastic.
The camshaft bearings should fit without any tight spots to enable a free-spinning camshaft.
They should make sure the crankshaft turns liberally without a rigid start on rotary motion or binding, and verify the crankshaft end float.
Builders must make sure to check and adjust the ring end gap and ring back clearance.
Put the rings properly. The inner chamfer should be upwards and the outer chamfer should be downwards, except marked otherwise.
Sufficiently oil up the pins and rings before the fit, and test the rod drop for taut pins.
Don’t tap down the pistons softly shove the pistons down, inspecting for correct ring drag.
Before rotating the engine, always verify the big-end side clearance and confirm the piston deck height.
Tension the tube head bolts in the right series.
Buff up the pressure relief valve so that it rattles back and forth in the housing liberally.
Prime the oil pump by utilizing the mix of petroleum jelly and engine oil.
It’s important to note that the specific steps involved in assembling a race engine can vary depending on the engine type and specific components being used. It’s always a good idea to consult a qualified engine builder or follow a reputable engine build guide to ensure that you are assembling your engine correctly.
Properly sealing an engine is crucial and requires attention to detail. To achieve a proper seal, high-quality gaskets designed specifically for the application should be used. It is important to follow the instructions provided with the gaskets for proper installation.
Avoid opening the gasket kit until ready to use, especially if it is vacuum-sealed. Exposure to air for extended periods can cause the gasket to dry out and perform poorly, leading to leaks and blowouts.
For racing applications, it is recommended to invest in high-quality gaskets designed to withstand higher temperatures and pressures.
If the sealant is needed, apply a thin line and press the gasket to distribute it evenly. Designers or builders must avoid using excessive sealant that can obstruct the flow of coolant, oil, or intake gases. Taking these precautions will ensure a reliable engine seal, hence leading to a better engine built.
After the designing, planning, and assembly process comes the tuning of the engine. Professional builders know how to build an engine from scratch, so when they have finished the assembly, it is optimized for the best performance in certain conditions. But on the racetrack, everything is different, temperature, altitude, humidity, barometric pressure, and many other things. If they don’t match with the engine which is tuned on the dyno, there will be low power. That’s why performance tuning is crucial to building a race car engine.
The tuning involves several steps that have to be looked into carefully. There is the tuning of race engines before practice, tuning during practice, and after practice.
Before Practice– Practice or hot laps have to be done before hitting an actual race track. It could be taken care of before leaving the shop, but some should be done before it leaves the pit. To inspect a car, visually check for any signs of damage and inspect the belts and plug wires for wear and melting. Check the timing at both idle and race RPM, ensuring that the mechanical advance consistently advances the timing when revving the motor and that the timing doesn’t change if the advance is locked out.
During Practice– During the practice, focus on the biggest speed gains. Chassis adjustment can create a massive difference in lap times when finding the best setup during practice time. Find a reliable chassis shop and make it a point to look into it. A poorly modified carburetor can also be the reason to make the car slower, so checking it would be wise for tuning during practice. Keep an eye on the float levels as well. If there is a stumble or hesitation during the turn, it’s time to fix it. Often there are a limited number of fixes that can be done during practice time, so when determining the most advantageous change to make, we suggest going ahead and making changes in big steps. The driver can tell professionals to make the changes according to the performance without wasting their time on small modifications.
After Practice– After the practice, we suggest you do another round of inspection. Check for coolant and oil leaks, wear and tear of belts, burned wires, and anything that seems to be amiss.
The driver can give proper feedback about the condition. Engine builders can ask her or him how the throttle inputs affected the engine if there was any vibration if everything appeared okay.
You must be wondering what is breaking in. It is a conditioning process where builders give the engine some time to break in. This phase gives engines time to operate so that they can adjust for future optimal longevity and performance. It lets the piston rings sit suitably over a cylinder wall, stopping jagged part wear. If one wants to achieve it, some guidelines have to be followed. It may vary from vehicle to vehicle. However, we can give you some tips on how to break in properly-
Mostly when a new engine is tested, there is a tendency to push its limits. A general rule to follow is to gradually increase the power. Pushing it to full acceleration may strain the engine leading to a waste of time for race car engine builders. When building a race engine, one should know that it is still new, and taking it easy is one way to deal with it. Do not overload it and avoid revving the race car engine and bringing it to the red line before shifting.
When taking a short trip, you don’t get enough of the engine. It takes time to warm it up and reach the optimal temperature. Low or cold temperature hinders the lubrication of the engine parts, which causes untimely engine wear.
The initial thousand miles of usage have a more severe impact as the engine parts have not yet fully adapted, leading to the increased wearing of the components.
When breaking in, the person has to make sure that engine speed, load, and rpm vary. When activating the cruise control in this phase is not of any use as it sets a stable engine speed. Try avoiding using cruise control to allow the engine to little in properly. This is just for the first 100 miles.
There are several advantages of breaking a brand-new engine. It provides better engine performance and a long-lasting engine. But if one doesn’t do it perfectly, it will be of no use.
When there is a proper engine break-in, there will be no premature engine parts wear and tear.
If you exert excessive force on your engine during the initial one thousand miles, you may face the subsequent issues:
• Reduced lifespan of the engine.
• Accumulation of oil in the cylinder wall leads to unnecessary oil consumption.
• Accelerated wear and tear of the cylinder wall.
• Malfunctioning camshaft lobes may cause the valves to open and close at inappropriate intervals.
Building a race car engine is a complex process that requires careful planning and execution. While many things can go right during the build, several common mistakes can derail the entire project. From selecting the wrong components to making errors during assembly, any misstep can lead to reduced performance or even catastrophic engine failure. In this section, we will tell you about the most common mistakes to avoid while building a race car engine, so that you can achieve maximum power, reliability, and performance on the track.
Make sure you or your team doesn’t make these mistakes-
We have seen people make this blunder quite frequently. It’s common to make a mistake when rebuilding engines. Even a small difference in size can cause problems. Some people assume that standard-sized parts are good enough because they look smooth. However, they can’t see slight differences in the cylinder or crankshaft. These small differences can affect how long your engine will last. Use a micrometer to measure the bore and crankshaft to ensure your engine lasts as long as possible.
Are you using the wrong tool to measure the engine’s dimensions? Correct and upgraded tools maketh a great object. In the case of race car engine construction, using a suitable micrometer is vital. Calipers can be useful in several tasks, but they are not suitable for measuring engine components as they can influence the slightest movement of the wrist. Instead, we recommend using a micrometer, which is easier to keep perpendicular to the measured component and only moves when the thimble is turned. However, using a micrometer requires some experience, so refine the technique using established standards to ensure accuracy.
In case there is a damaged valve seat surface it’s essential to restore it using a valve seat cutter rather than relying on a valve lapping compound. Many people believe the valve lapping compound can fix the issue, but it’s ineffective in removing sufficient material to repair the valve seats. If you don’t have a valve seat cutter, you can seek assistance from a local automotive machine shop. However, if you own multiple racecars, it may be worth investing in your valve seat-cutting equipment.
Usually, the new piston ring needs some last-minute adjustments. One of the common mistakes to avoid while building a race car engine is failing to check the end gap of the rings. If the end gaps of the rings are not double-checked after they have warmed up, there is a risk of the piston seizing in the cylinder. It’s crucial to fit the rings on the piston and drive them into the cylinder separately to avoid this. Then use a feeler gauge to measure the end gap and make necessary adjustments using a file to expand the opening. By taking these steps, you can ensure that the rings fit properly, reducing the risk of engine failure during the race.
Do you know that the seal is always better when the combustion chamber produces more power? Even if the engine hasn’t blown a head gasket, use a feeler gauge and a flat service to inspect the flatness of the cylinder head. One can use a glass countertop or a granite surface plate to ensure a flat surface. Flatten the head if there is any gap between the bolt holes and a.003″ feeler gauge. One can accomplish it by sanding the surface with medium to fine-grit sandpaper, adding water, and moving the cylinder head back and forth several hundred times. This process is easier and quicker than one might expect.
Most often, not checking the bearing clearance is usual. A race car engine builder may think that a crank check to normal specifications is okay if tested at all. The most horrible thing you can do with a race car engine is to tighten the bearing a bit too much, specifically on the rod and on a higher rpm-engine. When spinning them up, there is a stretch on the rod that pinches the bearing or doesn’t get sufficient oil to make it cool enough. This causes the bearings to be unsuccessful.
Having a fair share of experience, we have seen it many times- using assembly lubricant or engine oil on the bearing’s back when not needed. It is important to have a good crosshatch pattern on the bearing saddles and to keep them completely dry to ensure proper bearing crush and security in saddles and connecting rods. When installing crank and piston/rod assemblies, it is essential to lubricate the bearings and journal surfaces thoroughly.
Using the wrong sealers for the racecars can have grave repercussions. When inserting rocker arm studs or bolts that terminate in a water jacket, it is advisable to use a high-quality Teflon sealant specifically for commercial-grade applications. Using such sealants ensures that the threads are effectively sealed and prevents any coolant leakage into the engine oil. It is important, however, not to go overboard with its application. Applying excessive amounts of sealant can have the opposite effect and cause leaks due to the inability of some Teflon sealers.
Builders should never reuse the cylinder head, rod, and main cap bolts to make an engine. If a fastener is torqued to the needed specifications, it stretches away and cannot provide sufficient clamping pressure any longer when used again. We recommend using good quality fasteners throughout the engine for optimal engine durability, as they are crafted to the highest standards. During an engine rebuild, it is essential to replace connecting rod nuts when reconditioning the rods and refrain from reusing old bolts. Builders can source the cylinder head and main cap bolts from various suppliers. Additionally, it is imperative to apply thread lubricant and ensure that threads are chased smoothly.
When people know how to build engines from scratch, they should also know that there are various alternatives for valve seals. Seals made of Teflon have high popularity among almost all racers. There used to be powerful umbrella seals that are no longer usable. Builders can also find many other varieties depending on the requirement. Although you must know that some valve seals do not work well for street usage. Let the professionals handle it to make a perfect racecar engine.
There are various ways to build race car engines. Having suitable parts is crucial to show the best performance. Many can create the best engine but still have faults in it. This can affect the car’s performance extraordinarily. Building a successful race engine requires an in-depth understanding of how to make an engine step-by-step, experience, and attention to detail. From selecting the right components to proper assembly and tuning, every step in the process is crucial to achieving peak performance.
Redeye Race Cars offer a comprehensive range of services to help customers build winning race engines. Benefit from expert consultation, custom race car parts and design, and timely and precision work. Working with a knowledgeable and experienced team can make all the difference in achieving success on the track.
Follow Us On Instagram


![Marc welding up some titanium bull horns .🙏 TEAM 🙏
Marc @marc_poldino
Rachel @rachel_poldino
Marc Jr @zombiemarcjr
Lori @loripaigegolden
Gary @grmotorsports
Troy @racewires
👀 FOLLOW ME 👀 On
▶️ Youtube. Click the link located in my profile.
#dodge #challenger #hellcat #redeye #demon #supercharger #turbo #supercharged #srt #mopar #hemi #horsepower #americanmuscle 🇺🇸#racing #twinturbo #v8 #jeep #car #boosted #carporn #racecar #carsofinstagram #cars #jdm #sportscar #carphotography #speed #motorsport #instacar
- [ ]](https://redeyeracecars.com/wp-content/plugins/instagram-feed/img/placeholder.png)